使用Socket进行网络通信具有以下特点:Socket基于TCP连接,也就是所谓的长连接,理论上客户端和服务器端在建立连接后并不会主动断掉;而我们前面提到的HTTP通信建立在请求-响应形式上,也就是所谓的短连接,协议本身是无状态的,仅仅是客户端向服务器端发起一次请求,服务器端响应后就意味着连接断开。实际应用中我们使用session/cookie 来解决HTTP无状态的问题。
TCP/IP协议参考模型将所有的TCP/IP类协议归类到四个抽象层中,这四层由底向高分别是:数据链路层、网络层、传输层和应用层。而Socket是在应用层和传输层中间的一个抽象层,并提供了一系列接口提供应用层在通信中使用,Socket通常用于即时通讯等应用场景。
本节我们介绍使用Socket进行简单的通信。使用Socket进行通信可以分为三个步骤:服务器端监听、客户端请求和连接确认。
以Java为例,建立Socket并通过客户端向服务器端发送一条消息的流程如下图:
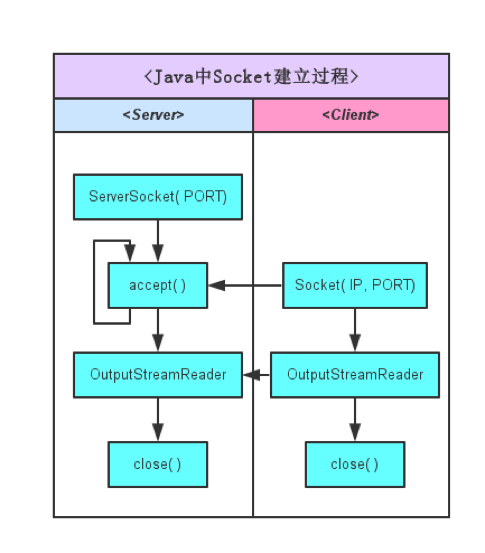
从服务器端开始介绍。
首先在服务器端类的构造函数中实例化 ServerSocket并绑定监听端口(065535之间,通常因为系统占用等原因01024内端口不建议使用):
|
|
然后使用accept阻塞,并用DataOutputStream包裹socket输出流,用DataInputStream包裹socket输入流:
|
|
分别启动收取线程和发送线程:
|
|
现在,服务器端就可以正常启动了。
然后开始介绍客户端。首先新建Android Project,新建空的activity,在布局文件中拖入编辑框、文本框和按钮等控件,并绑定响应的id以供调用。范例布局文件activity_main.xml
为:
|
|
在MainActivity中使用findViewById()绑定布局文件中的控件,给“连接”按钮(R.id.connet) 绑定点击事件方法connect(),给“发送”按钮(R.id.send)绑定点击事件方法send()。因为监听端口收取服务器数据是一个循环等待的操作,如果在主线程中使用会使UI界面卡掉,所以我们在connect()方法中使用AsyncTask来进行异步操作。
|
|
我们在后台执行的doInBackground()方法中要进行以下几个操作:
- 与服务器端socket连接的建立和对soc流数据的包裹;
- 使用readUTF()方法循环读取数据。
完整的doInBackground()方法为:
|
|
在onProcessUpdate()方法中进行socket连接成功的提示,并将接收到服务器的通信数据追加到聊天记录框中,完整的onProcessUpdate()方法为:
|
|
现在介绍发送数据给服务器的send方法。由于不需要进行后台费时操作,所以我们直接使用writeUTF()方法将数据发送即可,完整的send()方法为:
|
|
运行程序,Android程序运行结果如下: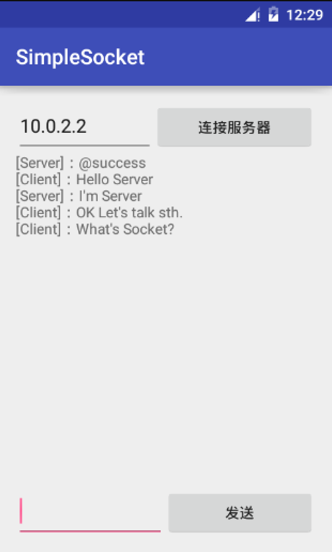
这里要注意在Android模拟器中访问本地站点(localhost)的IP为10.0.2.2。
服务器端运行结果: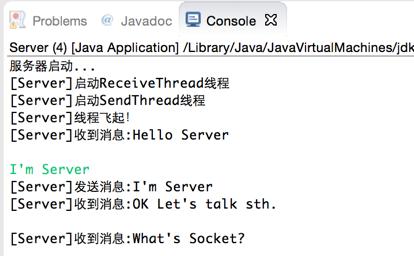
本节完整的程序见:
https://github.com/dettac/Study-Java-Socket-Together
[lesson6]